The Monk
The Monk is the Priest's alternate class, but unlike the Priest, the Monk is built to destroy. It became famous mainly for the powerful Guillotine Fist skill, which deals the highest damage any second class can deal in the game. Specialized Monk builds can be very effective in any scenario.
General class reference guide. ReClassic applies its own rebalance to several skills, so some builds and skills may differ from classic Ragnarok.
Becoming a Monk
Requirements: be an Acolyte, have at least job level 40, and have spent all your skill points.
The Monastery of Saint Capitolina is northwest of Prontera (`prt_monk`). There are 4 trials: gathering, recitation, marathon, and combat.
Step
What to do
1
Talk to the Guardian Monk (prt_monk,59,247) at the monastery entrance to be admitted.
2
Trial 1: gathering. Talk to Sensei Moohae (monk_in,99,58). He randomly picks 1 of 7 sets of items (table below). With job 50, he waives this trial.
3
Trial 2: recitation. Talk to Touha (prt_monk,251,255). You put together a prayer by choosing the fragments in the right order. You need to get all 10 right (answer key below).
4
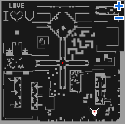
Trial 3: the marathon. Talk to Boohae (prt_monk,57,179) and then to the Gatekeeper (prt_monk,199,169) to enter `monk_test`. Run the laps (details below).
5
Trial 4: combat. Talk to Tomoon and clear the maze of undead. He gives you a Green Potion.
6
Go back to Sensei Moohaewith the Green Potion in your inventory and he'll turn you into a Monk.
WARNING: do not use or sell the Green Potion that Tomoon gives you. Sensei Moohae requires it to be in your inventory to perform the class change. Without it, you won't become a Monk.
Trial 1: Sensei Moohae's 7 Sets
Randomly picks one of these. With job level 50, this trial is waived.
Touha shows you 10 shuffled fragments of a prayer and you pick one at a time. Each fragment in the right position is worth 10 points and you need more than 90, in other words, all 10 correct. Getting even one wrong fails you.
The order of the fragments changes every round (the list of options is shuffled), so don't memorize the position, memorize the sentence. There are 3 possible prayers:
Prayer A
I seek the path
of enlightenment.
We monks
must remain faithful
to what we believe in
and help protect others
through the teachings
we have learned throughout our lives.
In nomine Patris, et Filii
et Spiritus Sancti.
Prayer B
I commit myself to
veritas and aequitas.
I will follow my path
toward enlightenment and purity.
I will protect my
brothers with my life.
veritas and aequitas.
Victorious as long as I draw breath.
In nomine Patris, et Filii
et Spiritus Sancti.
Prayer C
And we shall be shepherds,
for you my lord, for you.
The power descended forth
from the hands
so that our feet may carry us swiftly
let us obey your command. And we must
let a river flow for you and
full of souls it shall forever be
In the name of the Father, and of the Son
et Spiritus Sancti.
Trial 3: the Marathon (and the Mushroom Shortcut)
You run 10 laps on the `monk_test` circuit, passing by the Supervisor each lap. The course is full of traps: stepping on one sends you back to the starting point (it doesn't reset the laps you've already done, but it costs time).
The shortcut:Hyunmoo (prt_monk,225,180) handles the "mushroom test". If you hand him 30 Orange Net Mushroomor30 Orange Gooey Mushroom, he waives the rest of the marathon and sends you straight to Tomoon.
In other words: if you don't want to run the 10 laps dodging traps, gather 30 mushrooms beforehand and get it over with in one go. If you bring fewer than 30 mushrooms, he sends you to gather more.
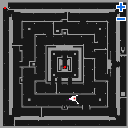
Trial 4: Tomoon's Maze
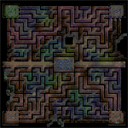
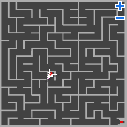
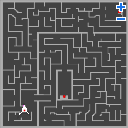
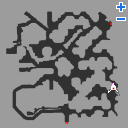
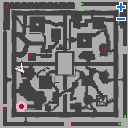
Tomoon sends you into a maze, and the order is literal: kill everything alive along the way. There are groups of Zombies and Mummies that appear as you make your way through the corridors.
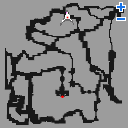
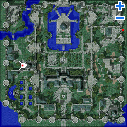
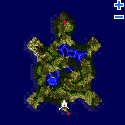
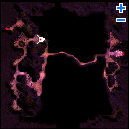
There are 3 different mazes (an examiner randomly picks yours). When you reach the exit, go back to Tomoon: he gives you the Green Potion as proof.
It's worth leveling up to job 50: besides the better weapon, you skip the gathering trial.
Leveling Spots
Map
Location
Difficulty
Notes
Lutie/Mjolnir
Easy to Medium
Get your first skill points leveling on this map.
Byalan/Ayothaya
Easy
If you're playing it safe and don't want to spend on potions, you can start in Byalan and go down the floors as you level up. You can also go to Ayothaya for easy job EXP.
Pyramids / Sphinx
Easy to Medium
At medium level, you can go to the Pyramids or the Sphinx. If you have someone to leech you, you can skip this map and go straight to the high level maps.
Beach Dungeon
Medium
Use Occult Impaction on the Stalactic Golems. They give a lot of EXP and drop several ores that can be sold to Blacksmiths. The Stalactic Golems can cause stun, so have enough VIT, stun resistance, or Flee gear to survive.
Clock Tower
Medium to Hard
The Alarms drop Brooch[1], which is a valuable piece of gear. You can hunt here if you have enough DEF and HP, since the monsters are aggressive and can surround you. The Alarms can cause blindness, bring Green Potions. Use Snap when surrounded.
Magma Dungeon
Medium to Hard
Magma Dungeon, the holy grail for zeny farming. Keep your distance and use Throw Spirit Sphere. Use fire armor (Pasana Card). Use an ice weapon for maximum damage. Use Snap when surrounded. Use Occult Impaction on high DEF monsters, since it increases damage based on the enemy's DEF.
Glast Heim
Medium to Hard
When you're getting close to high level, you can go to GH. This map offers a lot of leveling spots for different classes. As a Monk, make sure you can kill enemies fast enough, since the monsters here deal high damage, can surround you, and spawn quickly.
Turtle Dungeon
Medium to Hard
Another famous spot for high levels is the Turtle Dungeon. The monster density here is high, so you don't need to worry about running out of monsters to kill. Make sure you can kill them faster than they spawn. Go to the next floors for more EXP and monsters.
Nifflheim Field
Medium to Hard
Another high level spot is Nifflheim Field 2. Get a Priest to give you LV5 Aspersio Scroll. Have Bathory/Evil Druid armor to nullify Dark Soul Strike.
Sphinx
Medium to Hard
Anubis is your main target here. The EXP you get from a single Anubis is 28,000 base EXP and 22,000 job EXP. That EXP is absurdly high, so don't miss it. Have Bathory/Evil Druid armor to nullify Dark Soul Strike. You can also enter the portal in the center if you want to hunt Pasanas.


 Green Potion.
 Sticky Mucus ×5
  Earthworm Peeling ×10
  Green Herb ×20
 Monkey Tail ×20
  Iron Ore ×5
  Blue Herb ×3
 Stem ×30
  Jellopy ×5
  Insect Peeling ×10
 Solid Shell ×5
  Shell ×20
  Zargon ×5
 Cyfar ×5
  White Herb ×10
  Yellow Herb ×10
 Tooth of Bat ×10
  Bear's Footskin ×5
  Poison Spore ×20
 Porcupine Quill ×5
  Cobweb ×20
  Bug Leg ×10
 Orange Net Mushroom or 30
  Orange Gooey Mushroom, he waives the rest of the marathon and sends you straight to Tomoon.
In other words: if you don't want to run the 10 laps dodging traps, gather 30 mushrooms beforehand and get it over with in one go. If you bring fewer than 30 mushrooms, he sends you to gather more.
Orange Gooey Mushroom, he waives the rest of the marathon and sends you straight to Tomoon.
In other words: if you don't want to run the 10 laps dodging traps, gather 30 mushrooms beforehand and get it over with in one go. If you bring fewer than 30 mushrooms, he sends you to gather more.
 Knuckle Dusters [2] if you became a Monk with job level 50
 Waghnak [3] otherwise