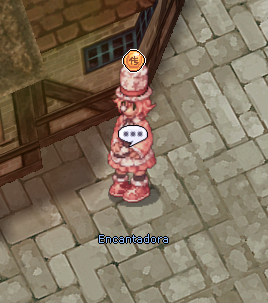
Enchantress Rebeca is an NPC located in Prontera (58, 88) who specializes in enchanting equipment with the powerful Abyss Orbs.
Functionality
Enchantress Rebeca lets players enchant their equipment with Abyss Orbs, adding special effects and improvements. The equipment that can be enchanted includes armors, garments, footgear, shields and weapons, and Perpetual Hats with a special orb.
Restrictions
Accessories can't be enchanted.
Weapons forged by blacksmiths can't be enchanted.
Equipment with 4 slots can't be enchanted.
Equipment that already has orbs can't be enchanted.
Procedure
1. The player must choose the equipment they want to enchant.
2. If the equipment meets the criteria, Enchantress Rebeca will show a list of orbs available for that type of equipment.
3. The player selects the desired orb and confirms the enchantment.
4. The enchantment is carried out upon payment of a fee in Zeny and handing over the selected orb.
Enhancement Orbs
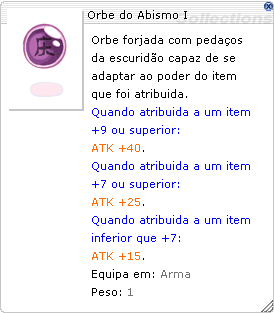
Warning: once an orb is applied to a piece of equipment, there's no way to remove it! Below are the bonuses that can be granted with each type of orb:
Image
Equipment
Orb Bonus (Refine +0 to +6)
Orb Bonus (Refine +7 or +8)
Orb Bonus (Refine +9 or +10)
Armor
+450 Weight Limit
+2% Max HP
+6% SP Regeneration
+3% Max SP
+3% ASPD
+900 Weight Limit
+4% Max HP
+12% SP Regeneration
+5% Max SP
+6% ASPD
+1350 Weight Limit
+6% Max HP
+18% SP Regeneration
+8% Max SP
+9% ASPD
Footgear
+150 Max HP
+35 Max SP
+10 Hit
+300 Max HP
+70 Max SP
+20 Hit
+450 Max HP
+105 Max SP
+30 Hit
Garment
+3% Neutral resistance
+10 Flee
+4 Critical rate
+5% Neutral resistance
+20 Flee
+7 Critical rate
+7% Neutral resistance
+30 Flee
+10 Critical rate
Shield
+2% resistance to short-range physical damage
+3% resistance to magic and long-range physical damage
-2% after-cast delay
+4% resistance to short-range physical damage
+6% resistance to magic and long-range physical damage
-4% after-cast delay
+6% resistance to short-range physical damage
+9% resistance to magic and long-range physical damage
-6% after-cast delay
Weapon
+15 ATK
1% chance to drain 3% of damage dealt as SP
5% chance to drain 6% of damage dealt as HP
+3% MATK
+2 DEX
+25 ATK
1% chance to drain 5% of damage dealt as SP
6% chance to drain 8% of damage dealt as HP
+5% MATK
+3 DEX
+40 ATK
2% chance to drain 7% of damage dealt as SP
7% chance to drain 10% of damage dealt as HP
+7% MATK
+4 DEX
Classic Abyss Orbs
As Classic Abyss Orbs are exclusive to Vanguard and Veteran. The Traveling Blacksmith does the cutting, and each position is only cut in the region where she is at that hour (see the table below). There the player chooses the orb they want. Each attempt uses 4 Abyssalites and has an 8% chance of delivering the finished orb. When the cutting is not completed, the player receives Prismatic Shard. The Blacksmith trades 8 shards for the chosen orb, so every attempt makes progress. Rebeca engraves the orb obtained into the fourth slot of the equipment.
Where to polish each position
The Traveling Blacksmith changes region every 2h30 and, in each one, only polishes the orbs of one position. Times are server time. In her menu, the option is Classic Orbs [War].
All of them require a piece from the classic list at +9 refine or higher. Below that they do not activate. Pieces with a Classic Abyss Orb cannot be used by conventional characters. Conventional Abyss Orbs may stay socketed in classic equipment, but they grant no effect to Vanguard or Veteran.
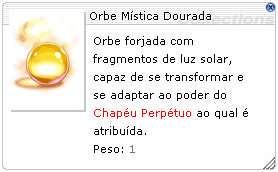
The Perpetual Orbs are powerful items that grant exclusive, progressive bonuses when attached to Perpetual Hats. These orbs are obtained exclusively through the item Golden Mystic Orb, which is the key to unlocking the orbs' potential.
How to Get It
Poring Roulette NPC: Available in the Jackpot category with a 1% chance.
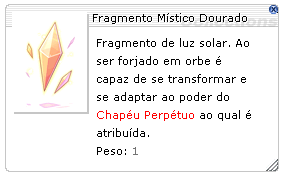
* You need 5 Golden Mystic Fragments + 1 Abyssalite to forge a Golden Mystic Orb at the Traveling Blacksmith NPC.
* The Fragment can be obtained through the Season Three Sealed Battle Pass.
* Temporal Dungeon MVPs drop Golden Mystic Fragments. See the full list.
The Enchantress Rebeca NPC is in charge of using Golden Mystic Orbs to grant progressive enchantments to Perpetual Hats, according to the levels listed in the table below. Each upgrade requires one orb to advance one level in the progress.
Note: The Perpetual Orb bonuses only take effect once the Perpetual Hat is refined to +9 or higher. This applies to all of the orb's effects: both the per-level increments (I to IX) and the Additional Bonus of Orb X. With the hat below +9, the orb grants no bonus at all.
Compatible Perpetual Hat
Orb Name
Increment per Level (I - IX)
Additional Bonus (Orb X)
Celestial Orb
I: After-cast delay -2%
II: After-cast delay -4%
III: After-cast delay -6%
IV: After-cast delay -8%
V: After-cast delay -10%
VI: After-cast delay -12%
VII: After-cast delay -14%
VIII: After-cast delay -16%
IX: After-cast delay -18%
Orb X: After-cast delay -20%, ATK +10%, MATK +10%
Elite Orb
I: Ranged and Aerial Attack damage +2%
II: Ranged and Aerial Attack damage +4%
III: Ranged and Aerial Attack damage +6%
IV: Ranged and Aerial Attack damage +8%
V: Ranged and Aerial Attack damage +10%
VI: Ranged and Aerial Attack damage +12%
VII: Ranged and Aerial Attack damage +14%
VIII: Ranged and Aerial Attack damage +16%
IX: Ranged and Aerial Attack damage +18%
Orb X: Ranged and Aerial Attack damage +25%
Royal Orb
I: Storm Gust and Meteor Storm damage +2%
II: Storm Gust and Meteor Storm damage +4%
III: Storm Gust and Meteor Storm damage +6%
IV: Storm Gust and Meteor Storm damage +8%
V: Storm Gust and Meteor Storm damage +10%
VI: Storm Gust and Meteor Storm damage +12%
VII: Storm Gust and Meteor Storm damage +14%
VIII: Storm Gust and Meteor Storm damage +16%
IX: Storm Gust and Meteor Storm damage +18%
Orb X: Storm Gust and Meteor Storm damage +30%
Abyssal Orb
I: Sacred Cross damage +2%
II: Sacred Cross damage +4%
III: Sacred Cross damage +6%
IV: Sacred Cross damage +8%
V: Sacred Cross damage +10%
VI: Sacred Cross damage +12%
VII: Sacred Cross damage +14%
VIII: Sacred Cross damage +16%
IX: Sacred Cross damage +18%
Orb X: Sacred Cross damage +30%
Majestic Orb
I: Physical Damage +2%
II: Physical Damage +4%
III: Physical Damage +6%
IV: Physical Damage +8%
V: Physical Damage +10%
VI: Physical Damage +12%
VII: Physical Damage +14%
VIII: Physical Damage +16%
IX: Physical Damage +18%
Orb X: Physical Damage +30%
Formal Orb
I: Combo and Occult Impaction damage +3%
II: Combo and Occult Impaction damage +6%
III: Combo and Occult Impaction damage +9%
IV: Combo and Occult Impaction damage +12%
V: Combo and Occult Impaction damage +15%
VI: Combo and Occult Impaction damage +18%
VII: Combo and Occult Impaction damage +21%
VIII: Combo and Occult Impaction damage +24%
IX: Combo and Occult Impaction damage +27%
Orb X: Combo and Occult Impaction damage +40%
Arcane Orb
I: After-cast delay -2%
II: After-cast delay -4%
III: After-cast delay -6%
IV: After-cast delay -8%
V: After-cast delay -10%
VI: After-cast delay -12%
VII: After-cast delay -14%
VIII: After-cast delay -16%
IX: After-cast delay -18%
Orb X: After-cast delay -20%, INT +10
Imperial Orb
I: Guillotine Fist damage +2%
II: Guillotine Fist damage +4%
III: Guillotine Fist damage +6%
IV: Guillotine Fist damage +8%
V: Guillotine Fist damage +10%
VI: Guillotine Fist damage +12%
VII: Guillotine Fist damage +14%
VIII: Guillotine Fist damage +16%
IX: Guillotine Fist damage +18%
Orb X: Guillotine Fist damage +30%
Whispering Orb
I: Back Stab and Raid damage +2%
II: Back Stab and Raid damage +4%
III: Back Stab and Raid damage +6%
IV: Back Stab and Raid damage +8%
V: Back Stab and Raid damage +10%
VI: Back Stab and Raid damage +12%
VII: Back Stab and Raid damage +14%
VIII: Back Stab and Raid damage +16%
IX: Back Stab and Raid damage +18%
Orb X: Back Stab and Raid damage +30%
Adorned Orb
I: Explosive Mammonite damage +2%
II: Explosive Mammonite damage +4%
III: Explosive Mammonite damage +6%
IV: Explosive Mammonite damage +8%
V: Explosive Mammonite damage +10%
VI: Explosive Mammonite damage +12%
VII: Explosive Mammonite damage +14%
VIII: Explosive Mammonite damage +16%
IX: Explosive Mammonite damage +18%
Orb X: Explosive Mammonite damage +30%
Angelic Orb
I: Chance to trigger Assumptio when using Heal +2%
II: Chance to trigger Assumptio when using Heal +4%
III: Chance to trigger Assumptio when using Heal +6%
IV: Chance to trigger Assumptio when using Heal +8%
V: Chance to trigger Assumptio when using Heal +10%
VI: Chance to trigger Assumptio when using Heal +12%
VII: Chance to trigger Assumptio when using Heal +14%
VIII: Chance to trigger Assumptio when using Heal +16%
IX: Chance to trigger Assumptio when using Heal +18%
Orb X: Chance to trigger Assumptio when using Heal +20%, Max HP +20%



 Prismatic Shard. The Blacksmith trades 8 shards for the chosen orb, so every attempt makes progress. Rebeca engraves the orb obtained into the fourth slot of the equipment.


 Golden Mystic Orb, which is the key to unlocking the orbs' potential.

 Celestial Orb


