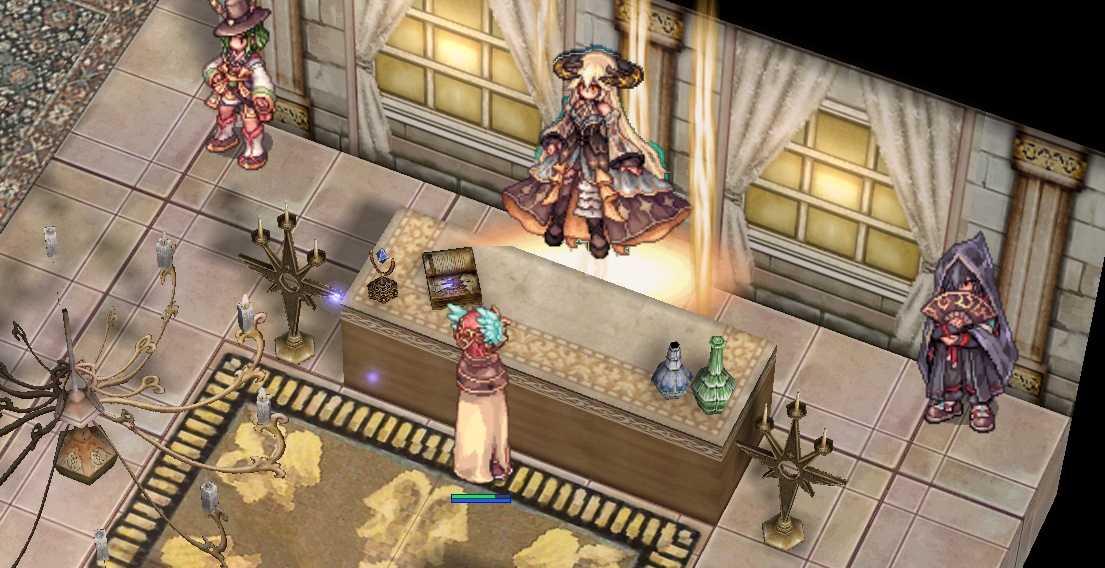
Cheffenia is the toughest arena in ReClassic. Inside it live 37 MVPs trapped in a cycle where death never ends anything: there are 165 monsters at the same time on the map, and every one that falls comes back instantly. The one in charge is Rigel, the Boss of Bosses, who took them all down one by one and, instead of killing them, trapped each one there. Every 5,000 deaths accumulated on the server, she releases her servant Elisa and opens the path to the final battle, against Rigel herself.
No equipment drops in there. What comes out of Cheffenia is materials: that is what you use to forge the Challenger's Helm, buy the Abyss weapons, and engrave the Enchants.
How to enter
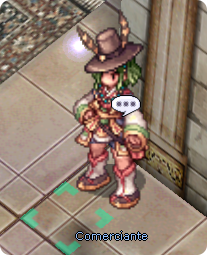
Talk to Commander Roderic, in the lobby, at bossnia_in 49,17. Minimum level 99.
×2
The safe passage
Each entry costs 2 Abyssalite Fragment, and only 1 during Happy Hour, from 20h to 22h. The first visit for each character is free, so you can check out the area before spending anything.
🔹 There's no life counter. If you die, you wake up at your Return Point; if you want to go back, talk to the Commander and pay for the pass again.
🔹 During Happy Hour the pass price drops by half, making it the cheapest window to keep trying against a boss.
🔹 The entry can no longer be paid with zeny, Cash Points, or tickets.
🔹 The Abyssalite Fragment comes from 1 broken Abyssalite via the Mineral Specialist, in Prontera, or from 30 Crystallized Abyssalite.
What you get when you enter
🔹 HP and SP fully restored.
🔹 Blessing and Increase agility level 10, for 30 minutes.
🔹 5 Celestial Fly Wings for free, on every entry, up to a cap of 20. You don't get in without a way to run.
Celestial Fly Wing
The arena is noteleport and noreturn: regular Fly Wing, Golden Fly Wing, and Return do not work. The Celestial Fly Wing is the only way to move around the map.
🔹 Drops from the MVPs themselves: 20% from the common ones and 100% from the five big ones.
🔹 Cap of 20 in the inventory. Once full, it stops dropping. It also can't go into storage.
🔹 Want to keep running? Keep killing.
Arena rules
🔹 Dying does not cost EXP or zeny. Whoever falls wakes up at their own Return Point.
🔹 Whoever is brought back instantly is not kicked out: with the Anti-Grave Ring ready, you revive standing in the same spot and keep hunting. If the ring is on its 30-minute cooldown, the death counts like any other and you wake up at the Return Point. The cooldown is shared per character: using two rings does not give you two returns.
🔹 You cannot teleport, save the map location, be taken there by a warp, or summon a monster with a Dead Branch.
🔹 The MVPs do not teleport and follow their own mechanics.
🔹 There is no MVP reward in the arena: everything that drops comes from the normal drop list, so Chewing Gum works for what's on it.
Powerful Crystals
A Power Source lights up from time to time in the arena, always at a different spot. When it appears, a warning shows on the map and its position is marked on everyone's minimap. It doesn't move: it stays lit for 90 seconds and then goes out on its own. It also goes out early if 5 people have already taken the blessing, so whoever gets there first takes it. Between one Source and the next, 10 to 15 minutes go by.
The Source changes its blessing every 10 seconds, and its color tells you which one is active. Whoever clicks it gets whichever one is active at that moment, so you can wait for the one you want. If it already passed, you'll have to wait for the next Source. The blessing lasts 3 minutes of transformation and bonus, both together. After that the character enters a personal cooldown of 10 minutes, so nobody stacks two Sources in a row.
⟶
Fallen Bishop Hibram
MATK +40%
⟶
Kiel D-01
After-cast delay -50%
⟶
Tao Gunka
Max HP +100%
⟶
Drake
Negates the weapon size penalty, physical damage +40%
⟶
Moonlight Flower
Movement speed +50
⟶
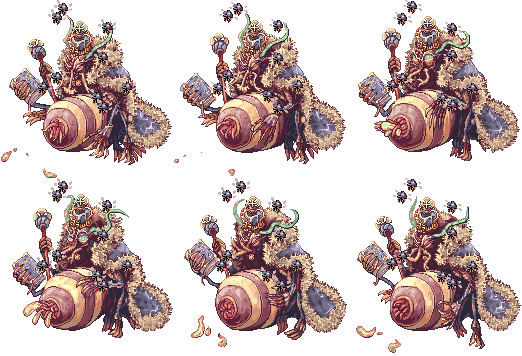
Queen Bee
Doesn't consume any consumables in the arena, not even SP
⟶
Atroce
Attack Speed at 195
Cheffenia MVPs
The arena's 37 MVPs have modified HP and practically the same drop list. None of them drop equipment: no weapon, no armor, no shoes, no headgear. What comes out of there is material.
What Each MVP Drops
Drop list, the same across all 32 regular ones
All Cheffenia MVPs drop the same items, at the same rates. The only exception is Tyrant's Heart, which only drops from the five big ones.
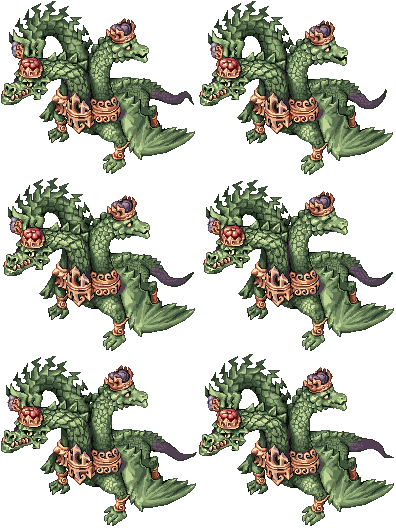
3%, only from the five big ones: Beelzebub, Fallen Bishop Hibram, Ifrit, Valkyrie Randgris, and Memory of Thanatos
What Comes From Script
Two things aren't on the drop list and are delivered directly by the server:
🔹 Sealed card of the monster itself: 1 in 20.000, fixed. Since it comes from script, it isn't affected by Bubble Gum, or by LUK, guild bonus, or VIP. The only thing that changes this rate is the Trail Lantern with that MVP marked: it gives +50% here, not the double it gives on the regular drop. The card goes straight into the inventory of whoever gets the kill (not onto the ground), and an announcement shows on the map.
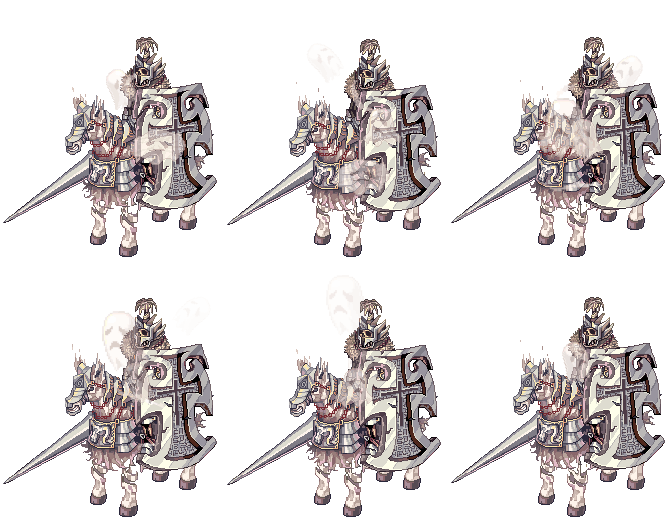
🔹 Celestial Fly Wing: 20% on the regular ones and 100% on the five big ones, and nothing drops if you already have 20. Rigel doesn't drop any.
A 1/20.000 card with your bag at its weight limit isn't lost: the server warns you and doesn't generate the item. Free up some weight and keep going.
⭐ The five big ones: they're the only ones that drop Tyrant's Heart, they give the most Granule, and the Celestial Wing is guaranteed from them. Memory of Thanatos joined this group when she stopped being the final boss: today she spawns in the arena like the others, and what sets her apart is her sealed card.
Sealed Cards
Each MVP in the arena can drop its own Sealed Card, straight into the inventory of whoever lands the final blow: 1 in 20.000, or 1 in 10.000 between 20h and 22h. Each card's effect, side by side with the regular card, is in MVP Cards.
The Cheffenia Scoreboard
A board at prontera 39,95 keeps two arena rankings, and the same two show up on the site, under Ranking → Cheffenia.
🔹 Most kills: every monster taken down inside Cheffenia is worth 1. It counts on both maps, the arena and Rigel's room.
🔹 Most damage dealt: adds up the total HP of every monster you take down. It isn't damage per hit: taking down Rigel weighs far more than taking down a regular MVP, and that's the whole idea.
🔹 Credit goes to whoever lands the final blow, and the count is per character, not per account.
🔹 GMs don't score.
Final Boss: Rigel
Cheffenia's owner is the final encounter. She doesn't spawn in the arena: whoever finds her is whoever closes out the counter.
🔹 With every death in the arena, the server's global counter goes up. The progress bar shows on screen while you're inside.
🔹 When it reaches 5.000 deaths, Rigel announces herself and her servant Elisa appears at cheffenia 363,367, marked on your minimap.
🔹 Elisa takes anyone who wants to go to 1@sthd, the boss room, where Rigel herself spawns: 300.000.000 HP, Demon, Shadow element level 4.
🔹 She takes 50% less damage from all sources. Against critical hits, the protection is even stronger: her Shielding cancels 100% of the critical's own Defense penetration; only the penetration gained from your build still gets through her Defense.
🔹 Inside the room, Backslide has a fixed 1 second cooldown. Outside of it, the skill keeps its normal cooldown.
🔹 She doesn't fight alone: she summons 4 servants at once, 2 Ember Sentinels and 2 Heralds of Rigel. They barely move from their spot, can't be knocked back, give no experience or item, and all disappear when Rigel falls.
🔹 Once Rigel is defeated, the 5.000-death counter resets and everything starts over. The Redeemed Rigel appears in the center of the room for 3 minutes and hands out 1 Golden Mystic Fragment and 2 Shards of Sin to everyone alive on the map. Whoever has a full bag can pick it up by clicking her. Elisa then offers to take you back to the arena or to the lobby.
🔹 Rigel drops the Rigel Card at 0,01%: +30% damage against Bosses and ignores 20% of their defense, which become +40% and 30% with the weapon at +9.
🔹 She changes behavior as she takes damage: below 80% HP she speeds up, below 70% the Earthquake begins, below 50% Infernal Judgment kicks in, and below 30% she grows stronger.
🔹 Below 20% HP she heals back to full. This ability comes back every 10 minutes, so the last chunk of her health has to go fast.
🔹 With her whole escort down, she summons four more, at most once every 30 seconds. And she pulls her servants back close to her when they spread out.
Fire, Formless. Tough against physical, fragile against magic (DEF 85, MDEF 20). Heals the other servants, blinds, and reduces the healing you receive, all from range (range 9).
Holy, Demon. Fragile against physical, tough against magic (DEF 40, MDEF 90). Stuns and burns, but only reaches melee range.
The two are built to counter each other on purpose: the Sentinel takes physical hits well and falls fast to magic, the Herald is the opposite. Leaving the Sentinel alive means watching the rest of the escort heal up the whole time. And taking down all four doesn't settle it for good: Rigel summons another wave.
What Rigel Drops:
The boss room is the only place in Cheffenia where MVP rewards apply: in the arena the map is set to nomvploot.
Happy Hour
The Keeper of the Abyss, at bossnia_in 28,24
The arena pays, the arena receives
Happy Hour doesn't come ready-made. It opens on its own with +50% card chance and nothing else. Everything beyond that is bought by the arena, during the day, in two independent bars kept by the Keeper of the Abyss.
Talk to the Keeper at bossnia_in 28,24 or type @happyhour from anywhere. Both bars reset every window: whatever's left over doesn't carry to the next one.
Quick Reference
What
Where
How Much
Where to donate
Keeper of the Abyss, at bossnia_in 28,24, or @happyhour
from anywhere in the world
Windows
08h to 10h · 20h to 22h
2h each, up to 3h30 with extra time
Raises the Shard
Steel (1 pt) · Heart (6 pts)
cap of 300 points
Raises the card
Zeny
100.000 = +1%, cap of 5.000.000
Extends the window
1 Abyssalite = 3 min
cap of 30, in the final 10 min
When It Happens
Window
Time
With Extra Time at the Cap
Morning
08h to 10h
up to 11h30
Night
20h to 22h
up to 23h30
🔹 The two windows are identical: same bars, same caps, same prices.
🔹 Each one has its own bar. Filling up the morning one does nothing for the night one.
🔹 You can donate any time of day. Whatever you hand in outside a window is saved for the next one.
What the Window Gives for Free
With Nobody Donating Anything
The window opens on its own with +50% MVP card chance and half a percentage point more on the Shard and Extract drop. Everything above that comes from the bars, and it only affects these two materials.
Raises the drop rate of Shards of Sin and Blessed Extract inside the arena. Accepts Cursed Steel and Tyrant's Heart, and nothing else: zeny doesn't count here.
The Heart is worth six because it's six times rarer: it only drops from the five toughest MVPs in the arena, while the Steel drops from all 37.
The Ladder
Points on the Bar
Equal to
Shard
Extract
0
nothing donated
2,50%
2,50%
60
60 Steel or 10 Hearts
2,90%
2,70%
150
150 Steel or 25 Hearts
3,50%
3,00%
240
240 Steel or 40 Hearts
4,10%
3,30%
300(cap)
300 Steel or 50 Hearts
4,50%
3,50%
🔹 The Extract always rises by half of what the Shard rises by.
🔹 The two materials can be mixed: 120 Steel plus 30 Hearts give the same 300 points.
🔹 The bar locks at the cap. Anything past 300 doesn't count.
Card Bar
Paid in Zeny
Raises the MVP card chance, from 1,50x up to 2,00x. Every 100.000 zeny is worth +1%, and the whole server can contribute.
Zeny on the Bar
Card Chance
In Practice
0
1,50x
1 in 13.333
1.500.000
1,65x
1 in 12.121
3.000.000
1,80x
1 in 11.111
5.000.000(cap)
2,00x
1 in 10.000
🔹 The two bars are independent: zeny doesn't raise the Shard, and material doesn't raise the card.
🔹 The card chance stays fixed and the same for everyone: Bubble Gum, LUK, and VIP don't change it.
The Extension
1 = 3 min
In the Final 10 Minutes
With 10 minutes left before the window closes, the extra time rush opens up: each Abyssalite extends the window by 3 minutes, at whatever level the bars are at. The cap is 30 Abyssalites, or an hour and a half.
🔹 When there are 10 minutes left, the whole server is notified that the rush has opened.
🔹 Several people can extend the same window, and the time adds up to the cap of 30 Abyssalites.
🔹 The rush continues during the time already bought. As long as the window is still active and there's room for more Abismalita, you can keep extending it.
🔹 The time is always added to the current end time, never to the clock: handing one in at 21h55 in a window that closes at 22h takes it to 22h03, not to 21h58.
🔹 Extending it keeps the bars at their exact level. It doesn't raise or lower anything, it just buys time.
Details That Matter
🔹 Bubble Gum doesn't double what the window gives or what the arena has bought. It only doubles the monster's base rate, so with Bubble Gum you get 4,50% Shard chance with no donation and 6,50% at the cap.
🔹 The bonus only applies inside the arena and during the window.
🔹 Whoever joins partway through the window gets the bars at their full level, with no penalty.
🔹 What you donate doesn't come back. Outside a window it stays saved in the bar and counts as soon as the next one opens.
🔹 The arena is notified when each bar passes the halfway point and when it hits the cap.
🔹 The whole server is notified of who extended the window and how much time was bought.
Quick Questions
Question
Answer
Can I donate outside the window hours?
You can, and that's normal. Whatever you hand in during the day is saved and starts counting once the window opens.
Is it worth joining partway through the window?
It is. Whoever joins gets the bars at their full level, with no penalty for the time missed.
Does filling the morning bar help the night one?
No. Each window has its own, and both reset at the end.
Can I mix Steel and Heart?
You can. 120 Steel plus 30 Hearts give the same 300 points.
Can more than one person extend it?
Yes, and the time adds up to the cap of 30 Abyssalites.
Does Bubble Gum improve what the arena has bought?
No. It only doubles the monster's base rate.
Does the bonus apply outside the arena?
No. Only inside Cheffenia and only during the window.
The Two Helmets
Cheffenia has two helmets, and they don't compete for the same slot. The Trial Helm is borrowed and lets you get to know the arena without spending anything. The Challenger's Helm is forged, it's yours forever, and it's the only one that grows. Both only take effect inside Cheffenia and in the final boss room.
The helm's path
From the loan to the complete helm there are four steps. Each one shows what it gives and what it costs.
1
Loan
Trial Helm
Commander Roderic lends your class's helm with a 6 hour charge. It brings the entire Challenger kit: the same effects, the same stats, and the same skill damage. It cannot be refined, has no slot, and never leaves your inventory.
Costsnothing, it is free
2
Forge
Challenger Helm +0
The Abyss Lapidary consumes the borrowed one and gives you your own. This one is permanent, refinable, and comes out with all three slots closed. One at a time.
Costs1 Trial Helm26 Cursed Steel5 Tyrant's Heart10 Crystal of Sin1 Golden Mystic Orb3,000,000 zeny
3
Refine
+7, +8 and +9
Each of these refines opens a slot: +7 opens the first, +8 the second, +9 the third. The cap is +9. The refine itself gives no bonus, and neither does an open, empty slot.
Coststhe game's normal refining, at your usual blacksmith
4
Seals
Complete helm
A Seal engraved in each open slot, chosen by you among your class's 10. Besides its own effect, each Seal adds +25% damage to all of the class's skills, so the full helm reaches +75% on each one.
Costs10, 15 and 20 Crystals, quadruple that in Steel, 5, 10 and 15 Hearts, and 1, 2 and 3 Orbsone price per slot, charged in all four materials
The rule that confuses people most: step 3 gives no bonus at all. Refining only unlocks the slot. It's the Seal from step 4 that deals the damage, and a Seal in a closed slot does not count.
Trial Helm
Borrowed, for free
Commander Roderic lends your class's Trial Helm free of charge. It comes with a 6 hour charge and disappears when it runs out.
🔹 It brings the entire Challenger Helm kit. The same effects: the class skill, the -50% SP cost, and the delay reduction. And the same size: +50 to three stats and full skill damage. What it does not do is grow: it cannot be refined, has no slot to open, and cannot receive a Seal.
🔹 There is no recharge: the helm is borrowed, it disappears when the charge runs out, and then you get another one. The first one each day is free; if you want another before the reset, it costs 1 Abyssalite. The count resets every day at 6 PM.
🔹 Never two at the same time, and no one can recharge this helm. With charge still left, the Commander refuses and tells you how much is left; he only hands out another one after the old one runs out on its own.
🔹 It never leaves your hands: it cannot be traded, stored, dropped on the ground, or sold.
🔹 There are 12, one per class. Bard and Dancer share the same one, the Performer's.
Challenger Helm
Forged, and yours forever
The Abyss Lapidary turns your Trial Helm into your class's Challenger Helm, with 26 Cursed Steel, 5 Tyrant's Heart, 10 Crystals of Sin, 1 Golden Mystic Orb, and 3,000,000 zeny. It comes out at +0, with all three slots closed, and no longer disappears.
The Challenger Helm shows one slot, and it is for a regular card. The three slots for Seals are closed and do not show on the item, which does not stop an engraved Seal from working.
Forge
Material
Quantity
Where to get it
Your class's Trial Helm
1
borrowed for free from Commander Roderic, and consumed in the forge
Cursed Steel
26
drops at 1.2% from any Cheffenia MVP
Tyrant's Heart
5
drops at 3% from the five big ones, and is guaranteed from Rigel
The forge uses up the borrowed helm: it is the base for the new one. And the Lapidary makes one at a time: as long as your class's Challenger is with you, she will not forge another. If you sell yours or pass it on, Commander Roderic goes back to lending the Trial one and the Lapidary forges another, but you pay the whole recipe again.
Refining opens the slot
The Challenger Helm is refined through the game's normal system, with your usual Blacksmith. There is no special refining in Cheffenia, and the refine itself gives no bonus to the helm.
What refining does differently here is open a slot:
🔹 +7 opens the 1st slot.
🔹 +8 opens the 2nd slot.
🔹 +9 opens the 3rd slot.
An open, empty slot is worth nothing: the bonus comes from the Seal engraved in it, and the helm never counts more Seals than open slots.
×100
What the Blessed Extract is for
The Extract is the currency of the Blacksmith's Blessing: the Lapidary exchanges 100 Extracts for 1 Blessing. It drops at 4% from each of the arena's 37 MVPs.
The Seals
You choose, it is not random
Each open slot receives a Seal, and you choose which one among your class's 10. There is no rarity: all 10 are worth the same. What drives the progression is the slot, which gets more expensive at each step.
Each of the 12 classes has its own 10 Seals, with the same 10 effects: that is 120 Seals in total. In the game each one carries the class name, like Hunter's Seal (STR) or Monk's Seal (Fury). A Seal from another class gives no bonus at all, even if it reaches the slot through some other means.
One Seal of each, never repeated: the same Seal cannot go into two slots of the same helm. With all three slots open you end up with 3 out of the 10, and the Lapidary refuses a repeat before charging anything. So there is no helm with STR +90 or with -60% damage from Boss monsters.
The 10 Seals, the same on all 12 helms. Besides what is in the table, all of them add +25% damage to all of the class's skills:
Seal
What it gives
And more
Seal (STR)
STR +30
Post-skill delay -5%
Seal (AGI)
AGI +30
Post-skill delay -5%
Seal (VIT)
VIT +30
Post-skill delay -5%
Seal (INT)
INT +30
Post-skill delay -5%
Seal (DEX)
DEX +30
Post-skill delay -5%
Seal (LUK)
LUK +30
Post-skill delay -5%
Seal (Fury)
Attack Speed +20%
+5 to two of your class's stats
Seal (Guard)
Max HP +25%
+5 to two of your class's stats
Seal (Instant)
Post-skill delay -20%
+5 to two of your class's stats
Seal (Rampart)
Damage taken from Boss monsters -20%
+5 to two of your class's stats
Which skills get the +25% from each Seal, by the helm's class. Every Seal of that class boosts all the skills in that line, and no class has only one skill:
Helm
Skills that receive the damage
Hunter's Challenger Helm
Arrow Storm, Aerial Strike, and Arrow Rain
Wizard's Challenger Helm
Comet and Jupitel Thunderstorm
Sage's Challenger Helm
Psychic Wave, Fire Lances, Ice Lances, Lightning Bolt, and Heaven's Drive
Assassin's Challenger Helm
Shredding Blades and Sonic Blades
Knight's Challenger Helm
Shockwave and Pierce
Blacksmith's Challenger Helm
Hurricane Fury and Explosive Mammonite
Priest's Challenger Helm
Adoramus and Holy Light
Crusader's Challenger Helm
Spear of Destiny, Crux Divinum, and Crux Sanctum
Alchemist's Challenger Helm
Proton Cannon and Acid Terror
Rogue's Challenger Helm
Explosive Copy and Stab
Monk's Challenger Helm
Gates of Hell and Throw Spirit Sphere
Performer's Challenger Helm
Storm of a Thousand Arrows, Melodic Arrow, and Slingshot
No class gets it on just one skill. Eight get it on two, the Hunter, the Performer, and the Crusader get it on three, and the Sage gets it on five. The Sage and the Monk also gain Abyssal Web and Zen from the helm, but those two do not deal damage, so there is nothing to add to them.
Abyssal Web is Cheffenia's web and only exists here: it traps the target for 30 seconds and reaches 9 cells, against the 16 seconds and 7 cells of Web Prison, the Sage's platinum skill. In both, an attack with the Fire property deals double damage to the trapped target and breaks the web instantly. Abyssal Web also does not consume Cobweb. The +25% is per Seal, it applies to all the skills in the line, and stacks with the Seal's own effect.
What each slot costs to receive its first Seal, and what it adds:
Slot
Refine required
Cost
Damage to the class skill
1st slot
+7
10 Crystals, 40 Steel, 5 Hearts, 1 Orb
+25%
2nd slot
+8
15 Crystals, 60 Steel, 10 Hearts, 2 Orbs
+50%
3rd slot
+9
20 Crystals, 80 Steel, 15 Hearts, 3 Orbs
+75%
Those are the prices for an empty slot. Once the slot has a Seal, swapping it always costs the 3rd slot's rate, whichever slot is being swapped: a Seal in the 1st slot costs 10 Crystals to go in and 20 to be swapped out.
The three slots together cost 45 Crystals of Sin (or 450 Shards of Sin), 180 Cursed Steel, 30 Tyrant's Hearts, and 6 Golden Mystic Orbs. The +25% is per Seal in an open slot and applies to all of your class's damage skills, stacked with each Seal's own bonus.
Refining gives no bonus at all, it only opens up space. All of the helm's power comes from the base and the Seals: reaching +9 without engraving anything does not change a single line of your stats. With all three slots closed you gain +75% damage on each class skill and 90 stat points, distributed however you choose.
🔹 The Seals only work inside Cheffenia and in the final boss room, like the rest of the helm.
🔹 Swapping a Seal always costs the 3rd slot's price, even if you are swapping the 1st or the 2nd: 20 Crystals of Sin, 80 Cursed Steel, 15 Tyrant's Hearts, and 3 Golden Mystic Orbs. The table's progression only applies to filling an empty slot; engraving over an existing one is always the more expensive operation. The Seal that was there is lost and does not come back.
🔹 Engraving is not possible in a closed slot, and the helm never counts more Seals than open slots: refine and Seal go together or neither is worth anything.
🔹 The Crystal of Sin is made from 10 Shards of Sin, with the Lapidary itself. The Shard drops at 2% from any MVP in the arena.
The helm is already worth a lot at +0 and with no Seal at all: the base does not depend on refining. All 12 give +50 to three stats of the class, enable a skill the class does not have, and reduce SP cost by 50%. The base skill damage ranges from +20% to +350%, depending on the hit: the Rogue's Stab is the highest, and their Triple Shot the lowest. Depending on the class it also comes with post-skill delay reduction (50% or 70%), Hit (+50 or +100), attack speed (+30%), or area damage on a hit that did not have it before.
Abyss Weapons
17 weapons, level 4
Cheffenia's weapons are bought from the Merchant, for 20 Crystals of Sin each. All of them have 3 slots, require level 80, and, unlike the helms, work on any map.
🔹 The first two slots are yours, for cards.
🔹 The third is where the Abyss Enchant goes.
🔹 The bonus below is the factory one, without refining: the weapon gains nothing from refining, refining is what unlocks the Enchant (+9).
Fire Lances, Ice Lances, Lightning Bolt, Ancient Spirits, Lightning Storm, and Fireballs +20%. MATK +15%. INT +3, DEX +1. Mage, Acolyte and their evolutions, plus Super Novice
Solar Rift, Glacial Rift, Cyclonic Rift, and Tectonic Rift +20%. MATK +15%. INT +3, DEX +1. Exclusive to the Sage
Abyss Enchants
+
Abyss Lapidary
The rest of the weapon's power comes from an Enchant engraved by the Abyss Lapidary, in the lobby (bossnia_in 45,26). Each attempt costs 1 Golden Mystic Fragment and 1 Crystal of Sin.
🔹 Only on a Cheffenia weapon, and only from refine +9 onward. The Enchant takes up the 3rd slot, and the first two stay free for cards.
🔹 You choose the branch, Physical or Magical. What you get within the branch is rolled among 6 rarity tiers, from Common, at 73%, up to Mythic, at 1%.
🔹 You can lock a good result and reroll as much as you like.

 ×2
×2

















 Cursed Steel
 Golden Mystic Granule
 Bloody Coin
 Abyssalite
 Tyrant's Heart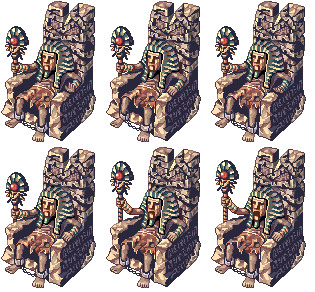
























 Crystal of Sin
 Golden Mystic Orb
 Cheffenia Weapons Box
 Rigel Card
 Zeny
Zeny




 Seal (AGI)
 Seal (VIT)
 Seal (INT)
 Seal (DEX)
 Seal (Fury)
 Seal (Guard)
 Seal (Instant)
 Seal (Rampart)
 Wizard's Challenger Helm
 Sage's Challenger Helm
 Assassin's Challenger Helm
 Knight's Challenger Helm
 Blacksmith's Challenger Helm
 Priest's Challenger Helm
 Crusader's Challenger Helm
 Alchemist's Challenger Helm
 Rogue's Challenger Helm
 Monk's Challenger Helm
 Performer's Challenger Helm


 Krysmor [2]
 Ravengrim [2]
 Ironhewer [2]
 Skyrend [2]
 Thalrion [2]
 Faithshard [2]
 Dreadspire [2]
 Luminis [2]
 Lyralis [2]
 Whisperlash [2]
 Zivarel [2]
 Selcryn [2]
 Alchivor [2]
 Malgrimoire [2]
 +
+